Over the past couple of weeks, I have been exploring around with virtual reality and 360 pictures/videos. Through this exploration, I have learned from and been inspired by Sylvia Duckworth (@sylviaduckworth), Kathy Schrock (@kathyschrock), Julie Spang (@jaspang), and Mary Marotta (@mmarotta). My main purpose is to find and implement authentic 360 experiences in the classroom. Sure, it might be cool to be able to take a picture or record something in 360. But how can one make sure that the learning experience has been enhanced.
Implementing 360 Videos
- Periodically, students and teachers attend field trips throughout the school year. One could bring a 360 camera with them and actually capture part of the experience. This then could be shared with students who could not attend due to being out sick for that time.
- Each year, students and teachers participate in what we call Intersession. This is where all parties involve participate in an experience beyond the typical curriculum. Some travel throughout the world – this year some students will be going to China as well as Machu Picchu. By capturing 360 video, Spanish teachers could integrate actual experiences with future classes about the location and culture.
- Each year our seniors are required to do a senior project. How cool would it be for a senior to record their application of knowledge? That senior could then take that video and have students virtually experience what the student experienced during their senior project presentation with the help of VR headsets. (Great idea Ms. Hatzidakis!)
- In the future, it would also be great for students to be able to take a 360 image and curate information relating to that image by placing hot spots. I know that some programs like Thinglink are already creating ‘spaces’ for uses to be able to do such a thing. Just a different way of sharing information beyond a typical Google Slide presentation or poster presentation.
Creating 360 Videos
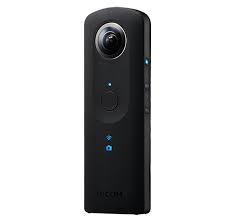
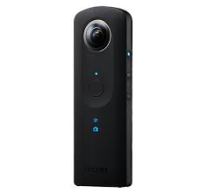 Our school purchased a Richo Theta S. This camera allows a user to be able to take still 360 images as well as record true 360 video. I have found it very easy to capture images and video from the device. I, however, found it a bit challenging to actually upload a 360 video to YouTube. You cannot just go to YouTube to upload the video file like you would with any other non 360 video.
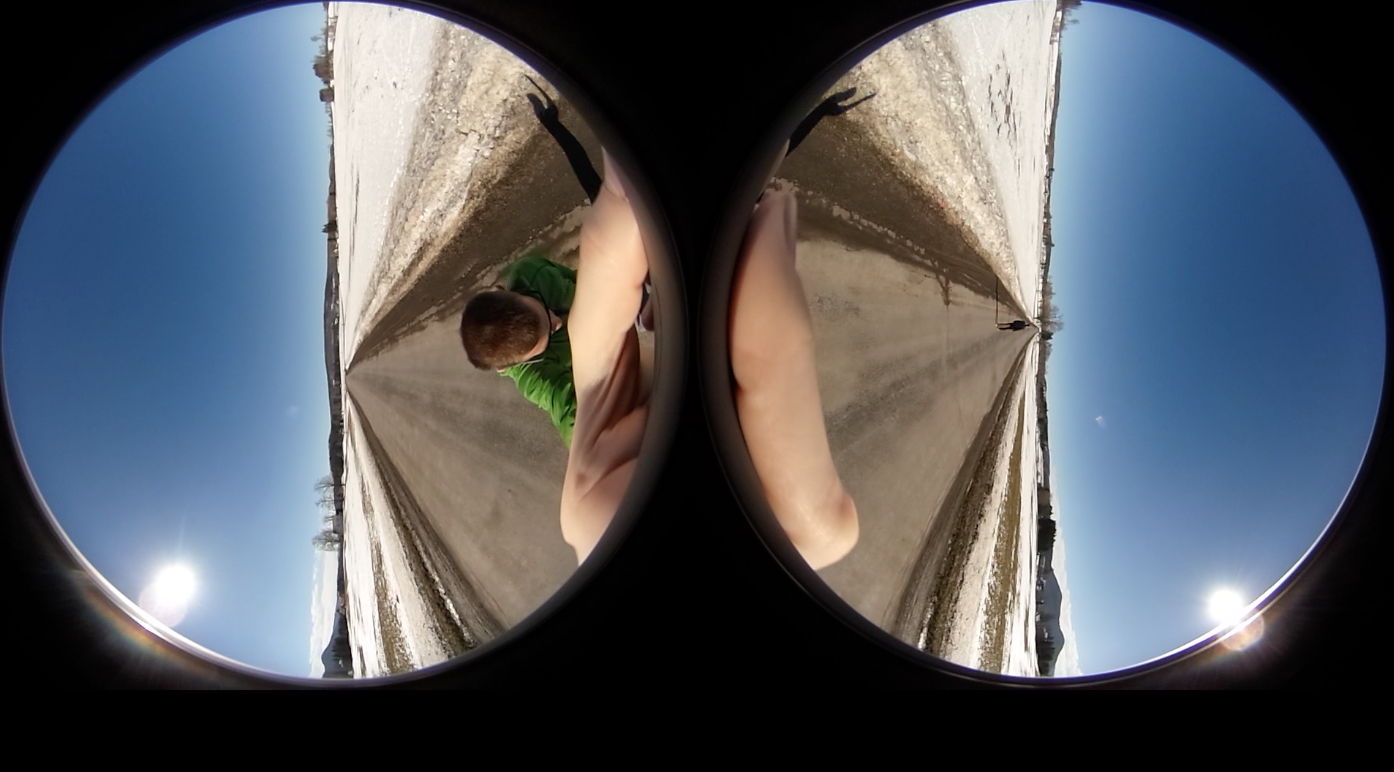
So, what is the process that I took? First I took the footage on the camera. I then followed the instructions that Ricoh provided on their website – where I connected the camera to my Mac computer. I found the file that I was interested in, but you will notice that the file is in the format of two different camera shots (see image below).
You must open the Ricoh app (already downloaded on my Mac computer) and place the file in the app. This will create the ‘360 file’ that you really want. Unless I am missing something, you cannot just place this MP4 file in YouTube. YouTube will not know that it is an actual 360 video. On YouTube’s help website, it states:
“Your video file needs to include certain metadata for 360° playback to be enabled.”
So, I had to install an app on my Mac computer so that it will add the metadata it needs into a new file. Instructions on this process can be found
HERE.
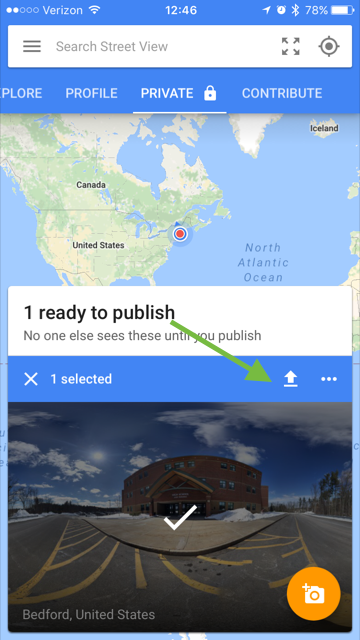
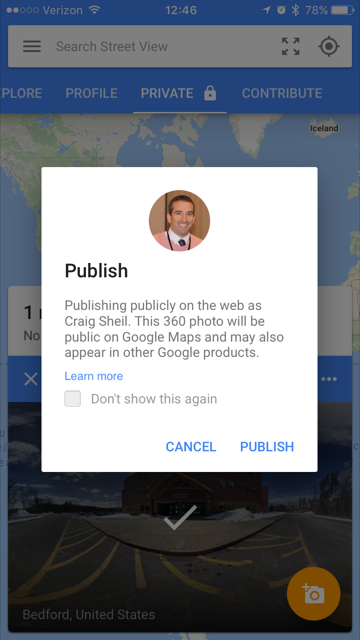
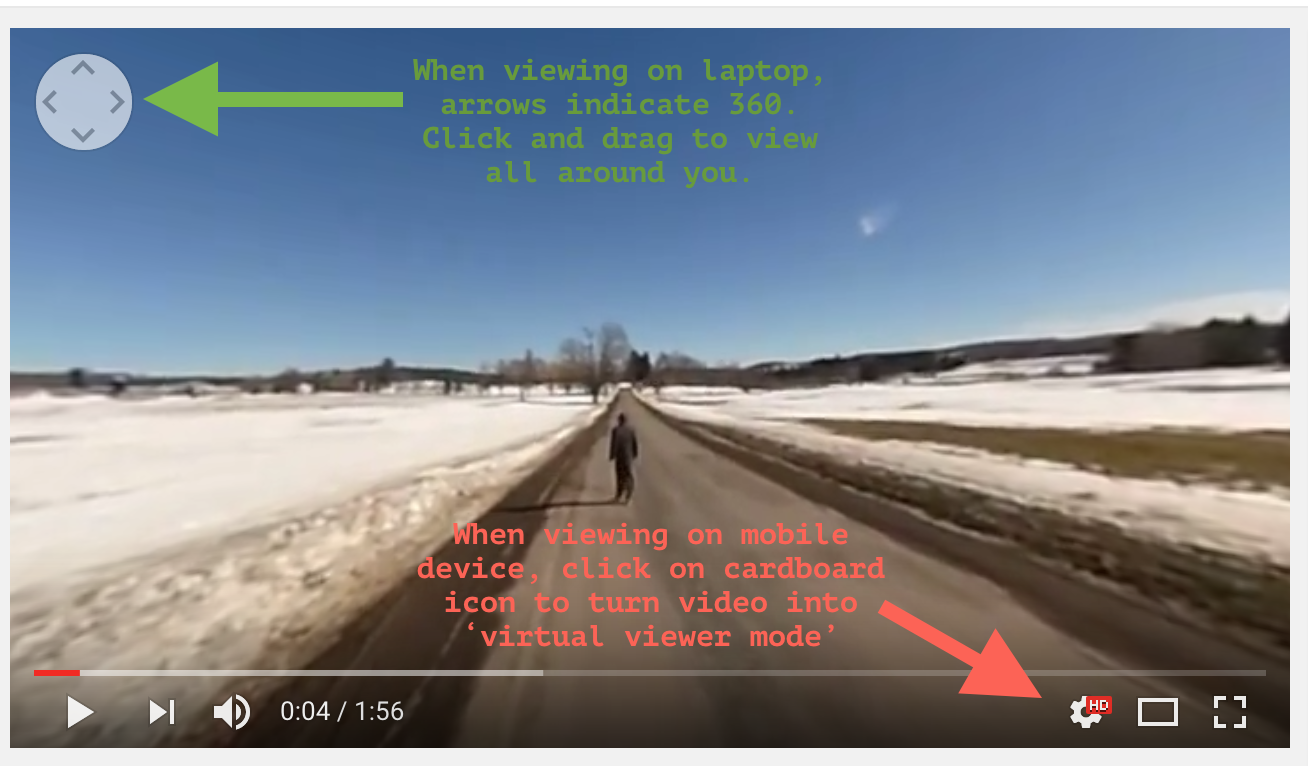
Once this was done, the file was then uploaded to YouTube. You will know that your video uploaded correctly if you see the arrows on the top left corner (when viewing video on laptop) or the cardboard icon shows up on bottom right corner (when viewing on a mobile device).
While this all seems like a lot of steps and a lot of work, it really isn’t. Just a new process of doing something new. Now that I know what is entailed, I will be able to do this much faster in the future.
Below is my very first attempt to uploading a 360 video to YouTube. It was filmed on a nice winter day on a country road. Yes, you will get to watch me walking in the middle of the road. I encourage you to see the difference between using a VR headset and a chromebook/laptop. The video most certainly will not receive any Academy awards as the quality is not great. I was more interested in learning about the process of how one could create such video. Moving forward, I would use a selfie stick or a camera stand (if stationary) when filming. You will notice that the camera does take itself out of the video but you can still tell that a hand was holding the camera while filming the video.
I can’t wait to investigate more with 360 videos and virtual reality. It seems as though this is where we are headed. Just have to keep in mind of practical uses in the classroom. You know where to find me if you want to chat about how you can implement this in your curriculum.
As always, that is my Spiel…


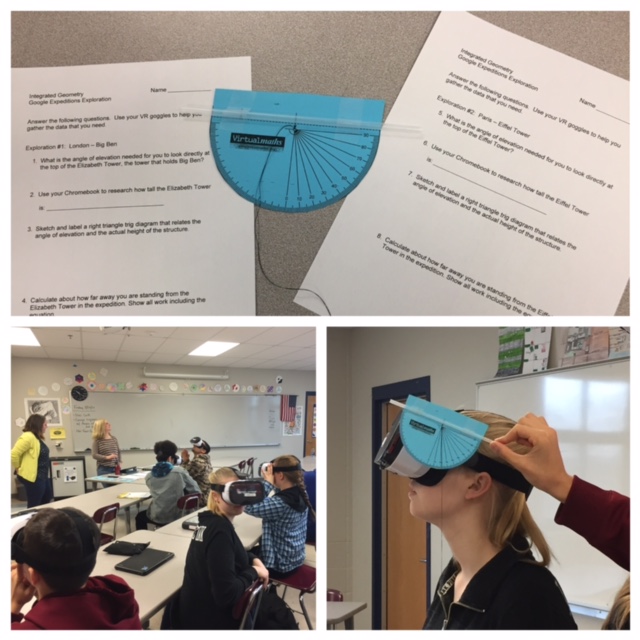
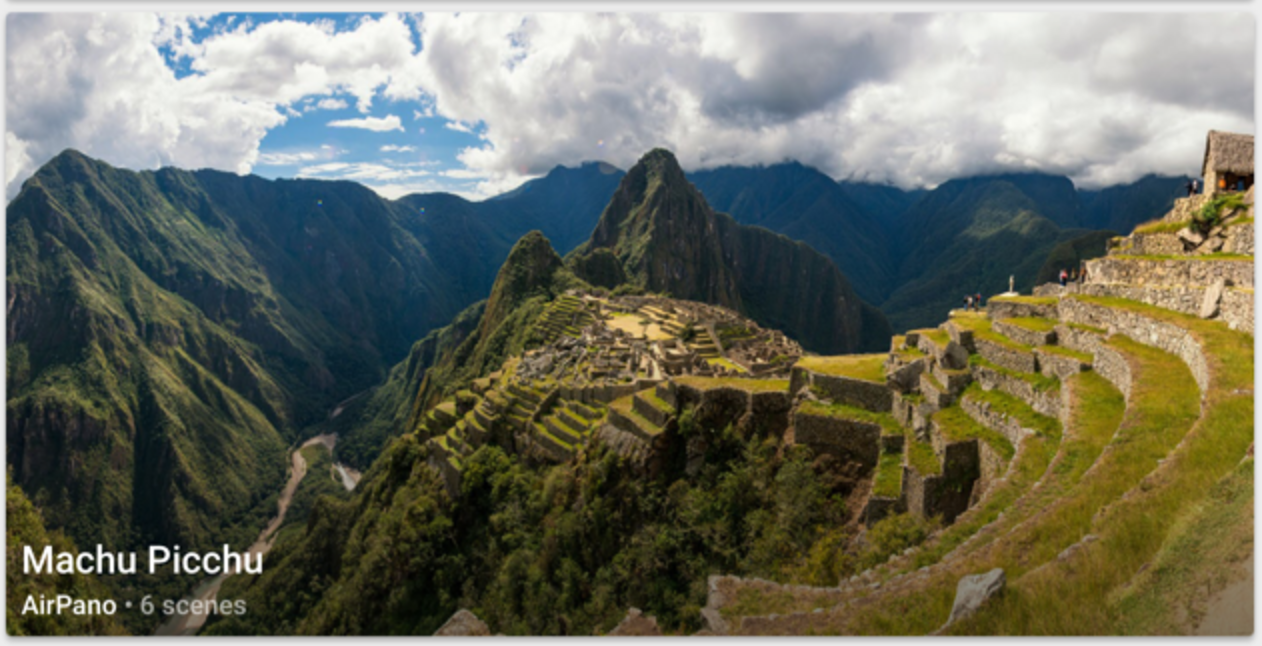 Mrs. Taylor, a Geometry teacher at BHS, decided to try out a similar activity but instead use Google Expeditions. To get the students used to the app, she showed them around Machu Picchu first. She highlighted certain geometric characteristics as well as showcase the area. We heard lots of ‘that’s cool’ and ‘can we go somewhere else’.
 Mrs. Taylor started a different Google Expedition, High Points of Europe: A Tour of Towers, and had those going to Paris virtually see the Eiffel Tower first. The partner then measured the angle of elevation the student took to see the highest point of the tower. Once the measurements were taken, students switched roles so that measurements could be taken by looking at the top of Big Ben in London.