On the sixth day of Google, we will take a look into Google Docs again. Some of the features below are not necessarily all new ideas but ideas that are worth taking a second look at.
NOTE TAKING WHILE WATCHING YOUTUBE VIDEO
There might be times where you are asking students to watch a YouTube video and take notes. Over a year ago, Google Docs allowed students the ability to preview/watch a video in a popup window while in the Google Doc. Students can determine how big or small of a window they want the video to play in. This can be helpful for students to shrink the video down so that they can type notes in the Doc. How to make this happen?
- Provide link to a YouTube video
- Students then select the link
- Hover over the video pop up and select Open Preview
- Students can then change the size of the video if it is too big
Click HERE to watch the process described above. Note: This feature also works with Google slides that have been linked in a Google Doc. Students can preview a slide presentation and take notes in a google doc as well. Same approach as listed above with a YouTube Video.
TO DO LISTS
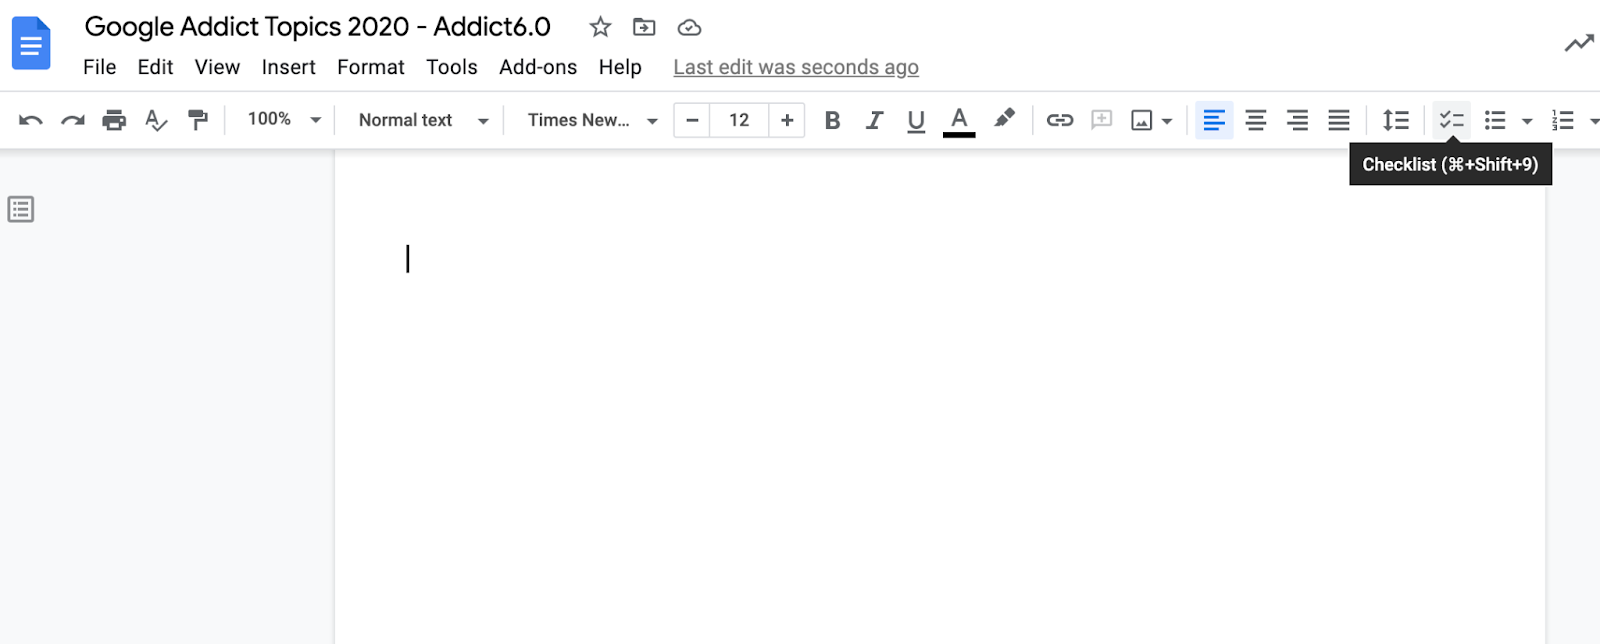
You now have the ability to create to do lists in Google Doc. This can be a great approach in helping students through a detailed or lengthy assignment. Provide the checklist in the document that students have edit access to. Then as they complete tasks, they can cross off the to do list. I have even seem teachers use this feature in a syllabus or beginning of a unit of study. Then as learning or tasks are completed, students/teacher is able to visually indicate where they are now in the study of the course.
How do you create a to do list?
- Place cursor where the to do list should be
- Then select the checklist icon in the menu (shortcut is command, shift, 9 on a mac or control, shift, 9 on a chromebook)
Once a task has been completed, select the box and it will cross the task off. It will not delete. The image below indicates where the check list icon is located.
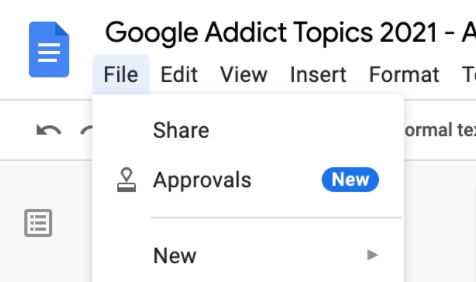
APPROVALS FOR DOCUMENTS
Google now has a more formal way in making sure that other people on a team have approved content in a document. I can see this really helpful when organizing content before being shared out with the community. For example, if I need to share out instructions about a certain protocol that parents need to follow, but I have to make sure the other 5 people on my team agree with how the protocol reads, I can use the new approval process.
How to make this happen?
- Under the file menu, select ‘Approvals’
- Determine who you want to give approvals
- Determine whether or not you want to all approvers to be able to edit the file; determine if you want to lock the file so that no one is able to edit the file while in approval mode
- Determine if there is a due date
You will notice if you convert the file into locked mode, not even you as the owner can edit. You can revert back, but it will be locked for everyone. In the right column, it will keep track for you who has approved and who you are still waiting to hear from. Below is a gif that walks you through this process. I can see lots of potential with this new feature.
If you have any questions, you know where to find me.
And that is my Spiel…