
 Many of us can relate to having students sign up for a one-on-one conference with students for a particular project/assignment. Many of us passed around a sheet of paper and students signed up by putting their name on a piece of paper. Many of us had students email times that were good until we found a time that worked out great. There is nothing wrong with either of the above mentioned methods. However Google Calendar can help streamline and make this process a bit more efficient as well as remind you of your meeting time.
Google Calendar has a feature called Appointment Slots with all GAFE accounts. In other words, you cannot use this approach on a personal gmail account. It is also important to understand that in order to use the method, students MUST have a gmail account in order to sign up for an appointment slot.
Examples of this Feature:
- Teachers setting up meetings with students during Midterm week for oral presentations that occur out of the classroom
- Administrators giving teachers opportunities to sign up to go over evaluations
- Librarian giving teachers opportunities to send entire classes down to pick up a new novel or textbook (this is something that our Librarian, Mrs. Gilcreast, has set up for our teachers to help streamline the process of knowing when classes can pick up textbooks and novels).
Below are instructions to using Google Calendar Appointment Slots
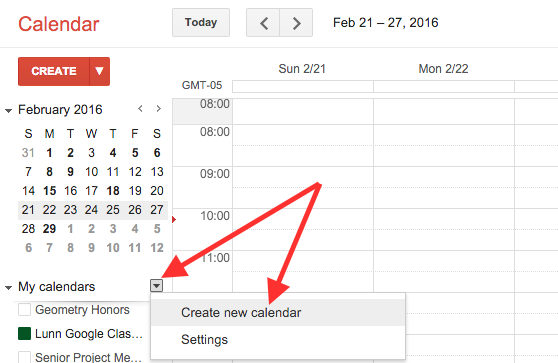
Step 1: Create a Calendar
Create a calendar that is separate from the default calendar that was created (don’t use the calendar with your name on it). You might want to create a calendar called meetings or appointments.
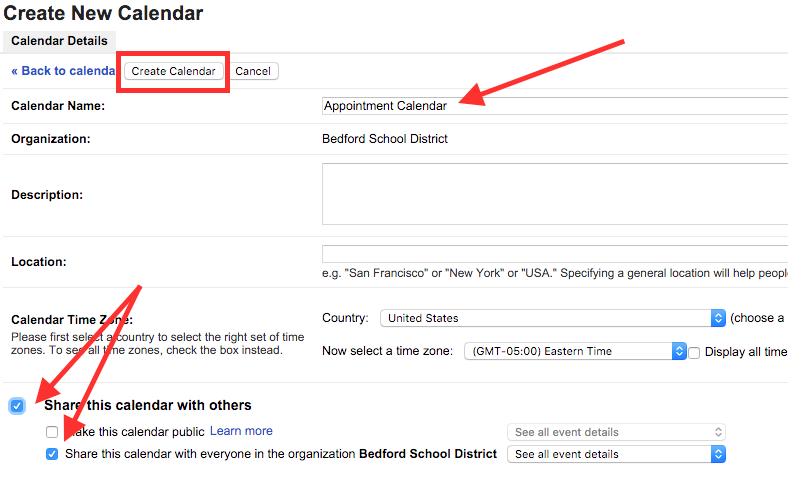
You will add the name of the calendar, on the next window. It is also important to change the sharing permissions to anyone in your school domain. Then hit the Create Calendar button
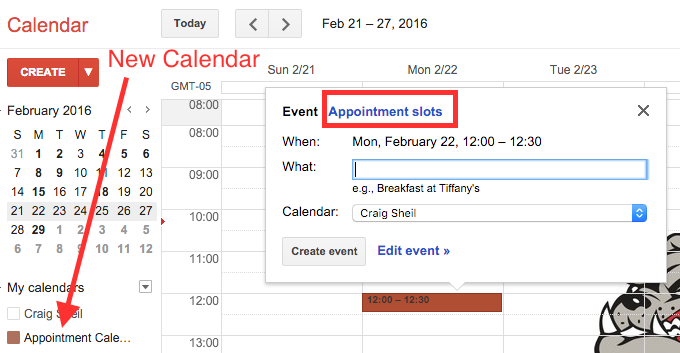
Step 2: Create the Event
The new calendar will show up under your own calendar. Once this is done, click anywhere on the day you want to create the appointment. A pop up window will appear. Be sure to select Appointment slots at the top.
The pop up window view will change – click on Edit details to fill out all the necessary information.
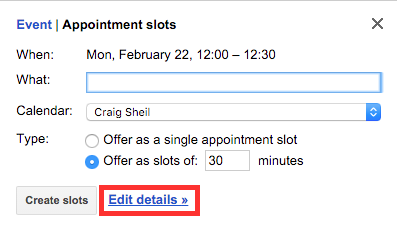
Step 3: Add information to Event
Add the necessary information to your event. Make sure you also select the RIGHT calendar from the drop down. Important to note that you create an event for the entire amount of time you are available and then determine how long you want the appointment slots to be. Google Calendar will then automatically create each of them individually.
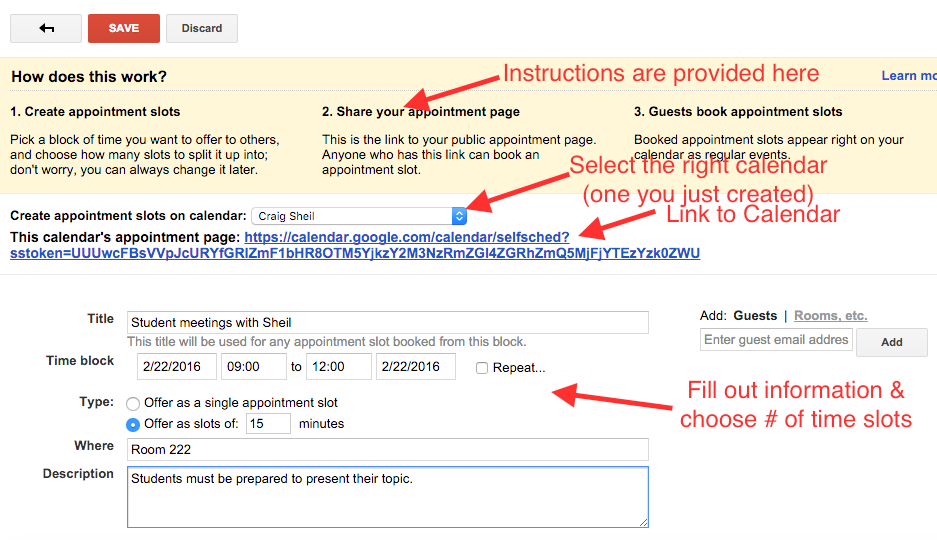
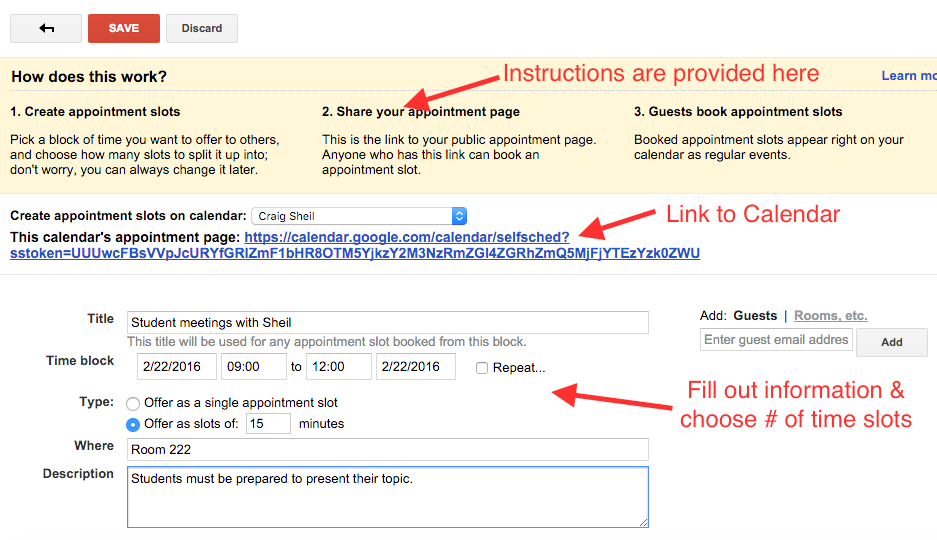
Step 4: Sharing the Link to Calendar
The link to this calendar is provided. This is the link that you would need to put somewhere for students to access, either through Google Classroom or a Teacher Google Site. Students will not be able to view your available appointment slots unless they have this particular link. Students must be logged in with their Google account (if they are not already logged in).
Step 5: Signing Up for Appointments
Once a student clicks on the calendar link, they will see the appointments that are available. Below are the separate appointments that were created from one entry 9am – 12pm availability with 15 minute appointment slots. As students start signing up for a time, they will no longer show up.
NOTE: When you hover over an appointment, it will actually give the specific time.
NOTE: You can also sign up for your own appointments if there are times that you want to block off throughout the block of time you created.

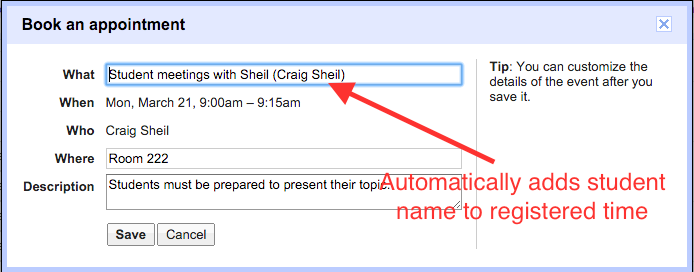
Once the student chooses a time, the appointment will automatically show up in your Google Calendar. Just click on the appointment and you will know who requested that time slot.

