*This post is near and dear to me seeing as though I used to teach math for eight years.
Virtual Reality is certainly a buzz word these days. Lately at our school, we have been exploring ways by which we can incorporate virtual reality in the classroom. One idea came from a math teacher, Trever Reeh, who blogged about having students explore angle of elevation.
Google Expeditions

 Mrs. Taylor, a Geometry teacher at BHS, decided to try out a similar activity but instead use Google Expeditions. To get the students used to the app, she showed them around Machu Picchu first. She highlighted certain geometric characteristics as well as showcase the area. We heard lots of ‘that’s cool’ and ‘can we go somewhere else’.
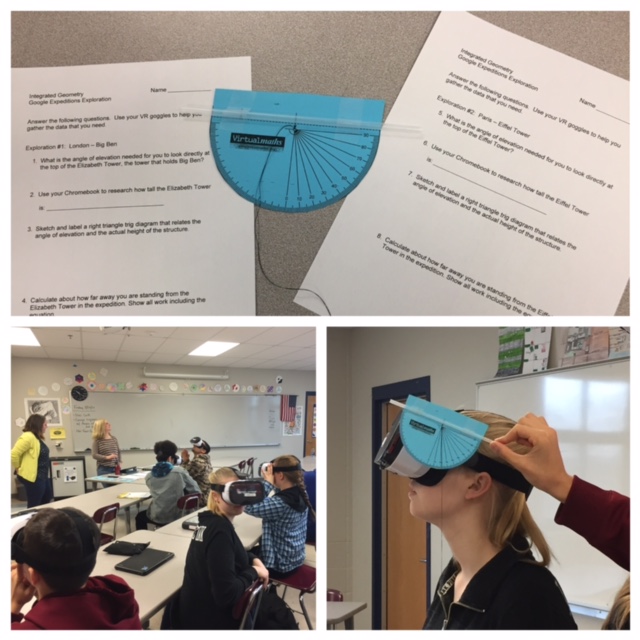
Next step was to get students to understand how angle of elevation and right triangles can help determine how far they are in the virtual world to certain landmarks. Two landmarks in particular were the Eiffel Tower and Big Ben. Students were paired up where one visited Paris, while the other visited London.
 Mrs. Taylor started a different Google Expedition, High Points of Europe: A Tour of Towers, and had those going to Paris virtually see the Eiffel Tower first. The partner then measured the angle of elevation the student took to see the highest point of the tower. Once the measurements were taken, students switched roles so that measurements could be taken by looking at the top of Big Ben in London.
Students then had to do some quick research on their Chromebook to find out information about how tall the towers are, with correct units, to determine about how far they are from the landmark in the picture.
This was such a great opening activity for the students to learn about a new mathematical topic. They were engaged and had fun. I certainly wish that I was able to implement this activity back when I taught Geometry to my students.
A BIG thanks to Trever for inspiring us to try this out activity. Of course, if you would like to chat about how you can use Google Expeditions or Virtual Reality into your curriculum, stop by and we can chat.
And that is my Spiel…