
Polling Students through Google Slides

Receiving formative feedback can be very helpful. There are many tools out there that help get that feedback, whether you use Kahoot!, Quizizz, Socrative, or Peardeck (to name a few).

Just recently, Poll Everywhere came out with a Chrome extension that allows Google Slide users the ability to embed Poll Everywhere questions right in a presentation.

I can see this being very useful when you know you want to ask your students a very quick question but don’t want to spend the time to add the presentation in a Peardeck or Kahoot! Poll Everywhere does have a free educator account (which is great) but only limits you to 40 responses per question. So, those of you who have class sizes higher than that would not be able to use this tool.

So the next time you have that moment of ‘I want to quickly add a question or two to a google slide presentation’ give Poll Everywhere a try.

STEP 1:
Get the Poll Everywhere Chrome extension. The actual official title of this Chrome extension is: Polling in Google Slides (This chrome extension has already been pushed to the staff in my district).

It is important to note that you will not ‘see’ the chrome extension with the rest of the extensions in the Chrome browser. Instead, a new menu option will show up when you have a Google Slide opened on your screen.

STEP 2:
Go to Poll Everywhere and sign up for the free K-12 Educational Plan. Click HERE for the direct link.

STEP 3:
Open up a Google Slide presentation that you would like to include a question or two in your presentation. You will notice the new menu option: Poll Everywhere.

STEP 4:
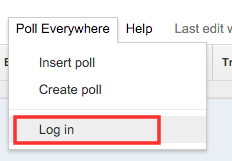
Log in to your Poll Everywhere account.
STEP 5:
Then select Create Poll. A pop up window will appear for you to choose the type of question. Once you hit insert poll, it will automatically insert a slide with that poll question on it.
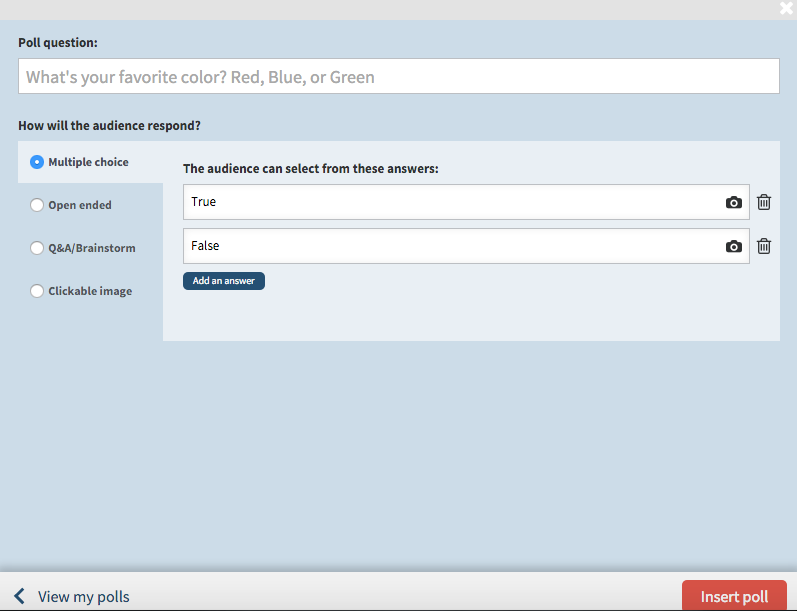
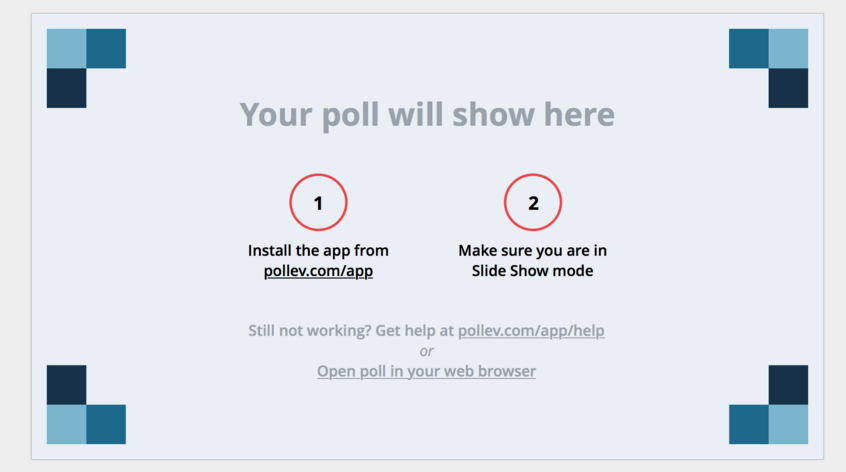
Important to Note: The actual poll question will not show until you are in present mode of your slide presentation. While in editing mode, you will see the following:

If you have any questions on how you can use this extension or you need assistance making this work for you, just let me know.
QR Codes: Way to Get Students Moving Around with Chromebooks

Looking to do something different with students and have them moving around in your class? How about creating QR codes for students to scan with their chromebooks to complete tasks. This can be a great way of changing things up, besides playing Kahoot! games, pushing an assignment through Google Classroom, or having students fill out an exit ticket.

Examples of Implementation:
At times, I see teachers having students complete tasks in groups with the use of stations. The groups work on that particular task and once time is over, groups are instructed to move to the next station to solve another task.

Mrs. Cooney and Mrs. Hatzidakis did this for their roots classes this week and the activity proved to be successful. They had several stations where students needed to visit. One student from each group would have a chromebook and would scan the code to access the content needed for that station. The group then worked together to accomplish the task. Some codes opened up articles from databases, YouTube videos, Google Drive files, etc.

Another possibility is creating a QR code treasure hunt where students have to answer questions in order to move on through the use of QR codes. If you are interested in this, check out classtools – VERY easy to use. What I like about this tool is that the QR codes are automatically made for you.

Creating QR Codes
Step 1: Find/Create items
You will first need to create or find things that you want to be scanned by your students. This can be a range of things from Google Documents with problems/questions on the, to an article on a website, to an image you want them to ponder about.

Step 2: Creating QR Codes
Once you have the items you want to use, you must then create your QR Codes. There is a Chrome extension that I use for this purpose. It is called goo.gl URL shortener.

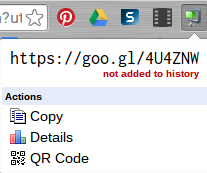
It is very easy to use. Have the website, video, or Google Document you want to create a QR code for opened. Then click on the goo.gl URL shortener Icon where all of your chrome extensions are located (top right corner of chrome browser). A window will open like the one below.

All you need to do is click on the words QR Code and a QR code will appear. Below is what that will look like. Then, click and drag your QR code to your desktop so that you can put it in a Google Document that you will print to post somewhere in your classroom or around the school.

Step 3: Getting the QR Scanner Chrome App
Before students can scan, they must have a particular Chrome App, called ScanQR. They can download this to their chromebook or you might need the administrator to your school domain to push this to your students. All students at BHS have this app pushed to them.

Step 4: Using ScanQR App
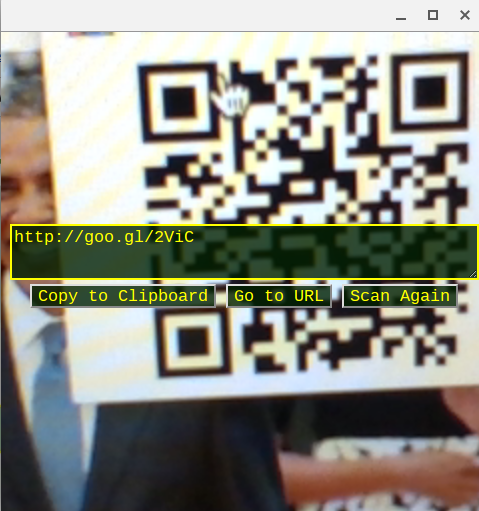
Student must then open the Chrome App on their Chromebook. For those students who have a swivel camera, they can flip the camera and scan the QR code. Once scanned, a window will appear with options. More than likely they will select Go to URL.

As always, if you have any questions on how to use this tool, you know where to find me.

Have You Shared with Classroom Yet?

Google has created a Chrome extension that allows teachers to be able to share information easily to students that are enrolled in their Google Classroom without having to log into classroom.google.com. The name of the extension is Share to Classroom.

In order to effectively use the power behind this extension, your students will need to have this extension in their account as well. (This Chrome Extension will be pushed to all BHS students in the very near future as this will work nicely with chromebooks.)

What You Can Do…

  • Push a website, article, video, document to students right on the spot without making an assignment/announcement
  • Push an assignment to the class
  • Make an announcement to the class
Push Content
I am a big fan of this feature. Everyday, we make spontaneous decisions based on where discussions are leading us. This extension helps support information you want students to access right on the spot. By using this chrome extension, you can send all students who have their device open a link to a website, video, article etc. This is similar to Google Tone (another Chrome extension) but I like how this is tied to a Google Classroom so that only those students in the class get the pushed site – not other students. 

For instructions and demonstration on how this works:

Posing Assignment and Announcement

You are able to post assignments and announcements in Google Classroom without having to be logged into classroom.google.com.

For instructions and demonstration on how this works:

As always, if you have any questions, let me know!

Calendar Integration with Google Classroom

It is finally here! Google Calendar has been integrated with Google Classroom.

Two Big Advantages:

  • Students are able to see all of their assignments for all of their classes in one view right in Google Classroom
  • Teachers are able to embed the calendar on their Teacher Website for parents without having to post content in both places. HUGE time saver!

Hiding Morning and Night Times in Google Calendar

The default to Google Calendar is for the entire day (24 hours) to show. There is a way however to set a particular range of time – times that you work or times that make most sense to you. You must enable a Google Calendar lab called Hide Morning and Night. The following screencast will walk you through the steps.