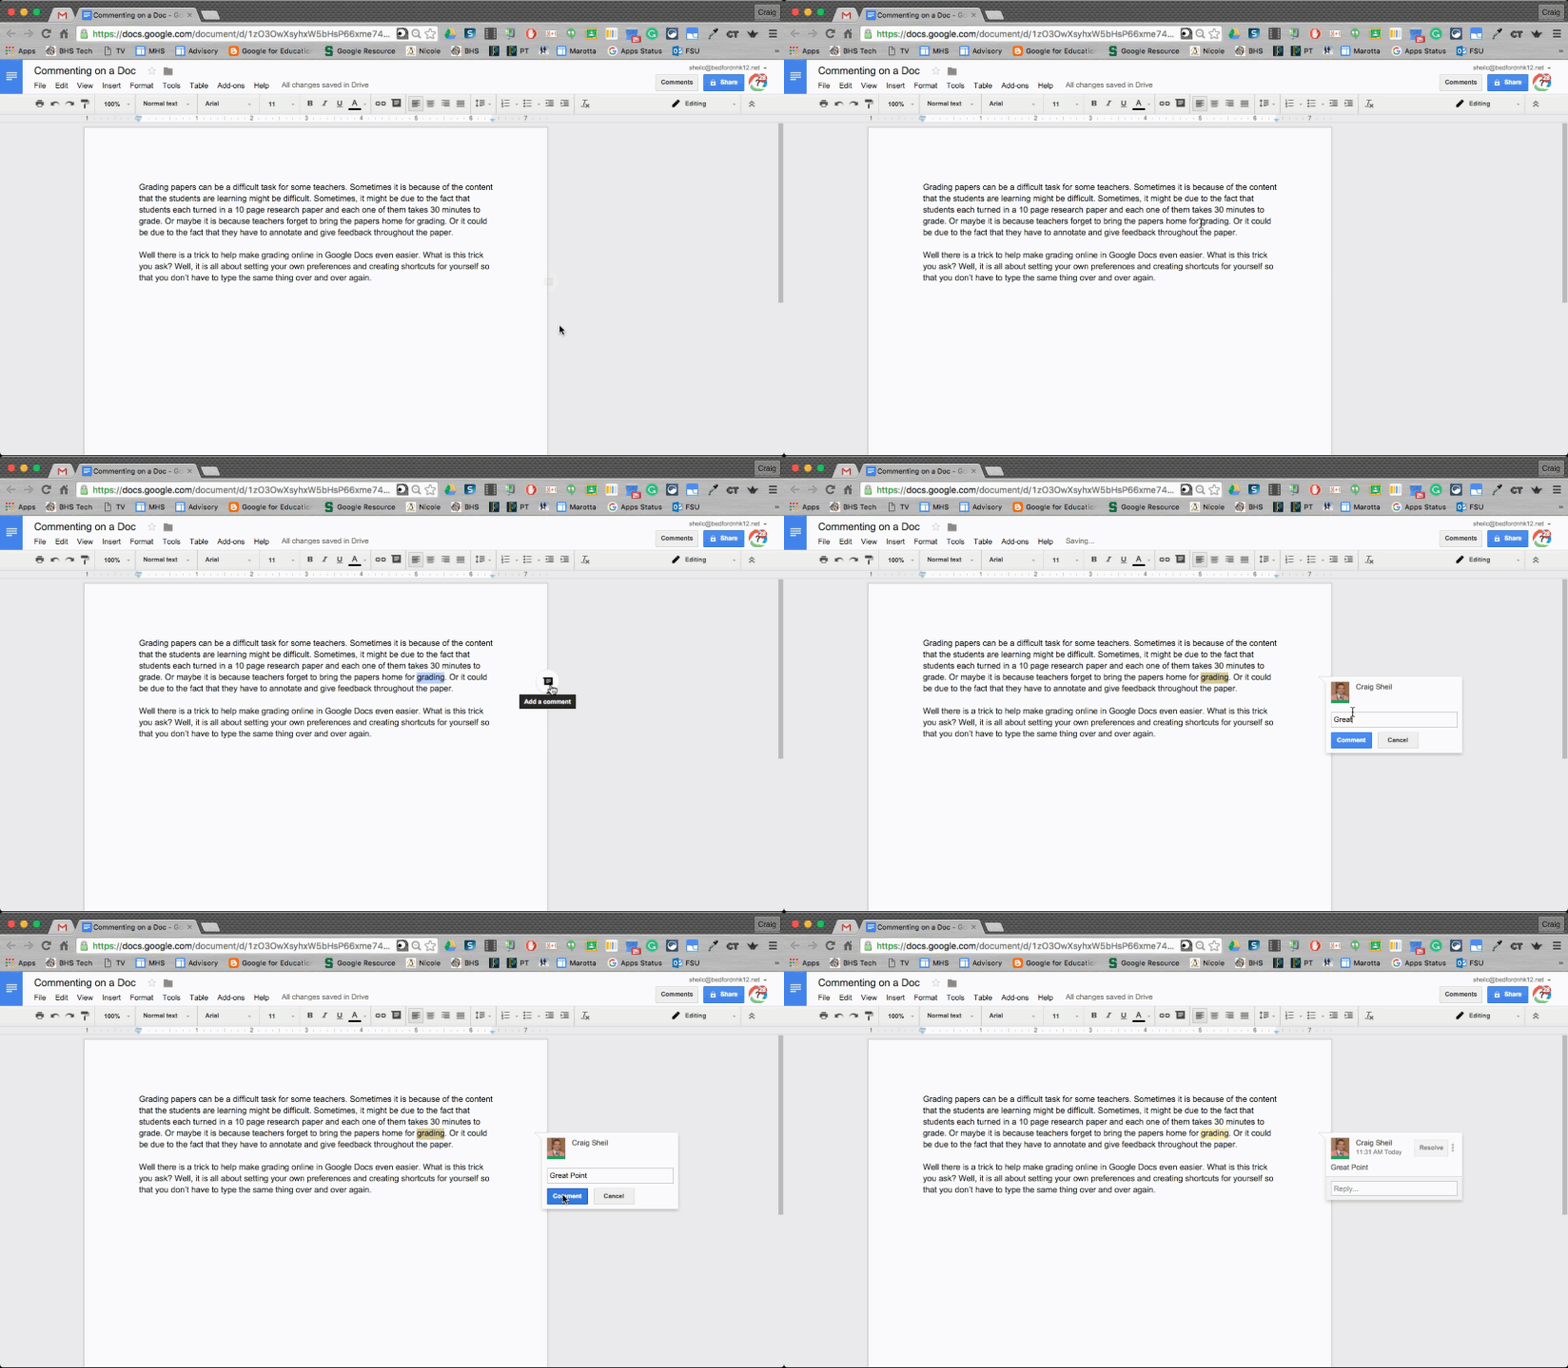
Google has made it easier for you to enter in a comment in a Google Document. I noticed that we actually received the update today in our school domain. Check it out in the gif below:
Flippity: Random Name Picker
There are lots of random name generators out there. They all have their advantages and disadvantages. However, in my mind, there is one that surpasses the others. Flippity.net has created their own random name generator. In four easy steps, you can have a great random generator at your finger tips. I will not replicate the process of how to use the tool as they are provided in clear step by step instructions on the Flippity website. Click HERE to follow the instructions.
I absolutely love this tool. With a click of a mouse or a tap on a track pad, you can immediately change a grouping or ordering of your students. This is a great tool for on the fly decisions as well as planned out activities. Below is a demonstration of my own roster of students and how quickly I can have Flippity change my preferences of groups or ordering my students.
Basically, you make a copy of a Google Sheet template that is provided on the Flippity website. You add the names of your students in class, then you publish the sheet to the web to get the link to your random generator. Then the magic happens and you have a useful tool at your finger tips. You will never have to recreate the process explained above as you just keep using the same Google Sheet for your class all year. (You can change the roster in the Google Sheet if need be – as we all know that your initial roster of students changes over the course of the year)
You will want a different Google Sheet for each of your classes. I would even recommend that you create a folder in your Drive, called Name Generator (or something similar), to place all of the Google Sheets that are connected to the Flippity random name picker. You can also bookmark the link to the random name generator for each of your classes as suggested on the website.
Flippity has some great resources. I have written a previous post on using their template to create a Jeopardy Game using Google Sheets. Click HERE to view that post.
If you have any questions on how to use this tool, you know where to find me. Guaranteed you will fall in love with this tool the moment you first use it.
Google Classroom: Return Assignments, Archive Classes & Reuse Posts
Here are some good reminders to Google Classroom, especially at the end of a semester.
Returning Assignments to Students
Since we do not use Google Classroom for reporting out grades to students, we can easily forget to return assignments to students. As a good practice, once assessment has been completed, assignments should be returned to students.
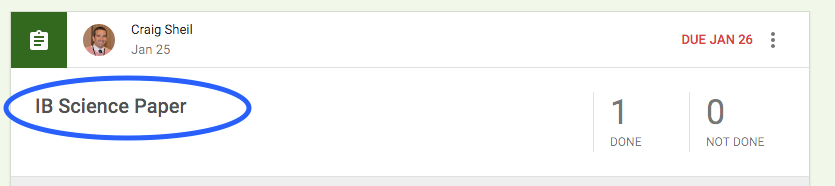
Step 1: Select the assignment you want to return to students
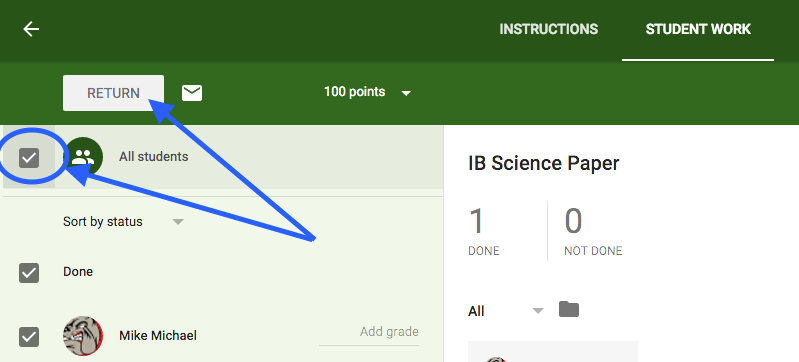
Step 2: Select which students you want to return the assignment to. If you want the assignment to be returned to all students, select the checkbox at the top left. Then select the Return button.
NOTE: If there are only 1 or 2 students you don’t want to return the assignment to, select the checkbox at the top left and unselect the few students that should not get the assignment back.
Archiving Classes No Longer In Session
If you no longer need the class because the semester or the year has ended, you can archive the class. This not only will hide the classes you no longer need but it will also save all of the assignments you have pushed out to your students.
Step 1: Make sure assignments have been returned to students that were sent through Google Classroom.
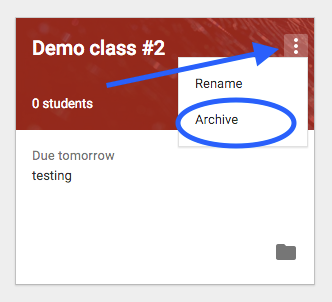
Step 2: From the main classes view (once you first get into Google Classroom) select the three dot button on the top right corner of the class and select Archive.
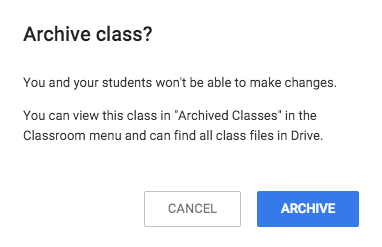
You will get a message asking you if you are sure you want to archive a class. This class will not be deleted, instead it will show up in the Archive section of Google Classroom.
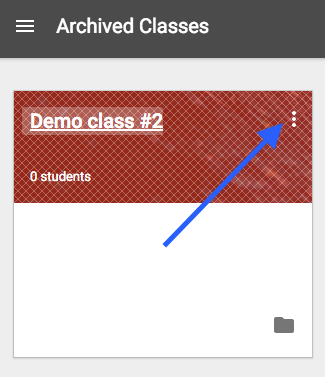
My class called “Demo class #2” is now located in the Archived Classes section. (Notice that there is a fence like look to the header of the class.)
NOTE: You do have the option to move this class out of the archived section if you had a need for it by clicking on the three dot menu.
You also still have access to the drive documents that were shared in the class by clicking on the Drive Folder icon on the bottom right corner of the class.
Reuse Posts For Future Classes
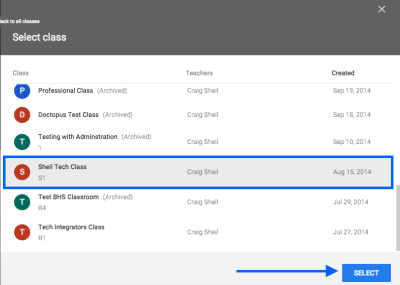
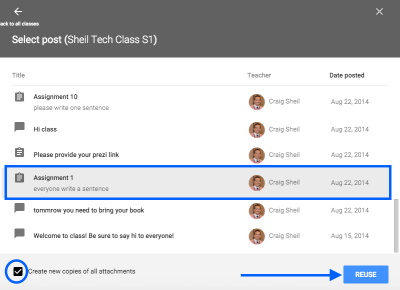
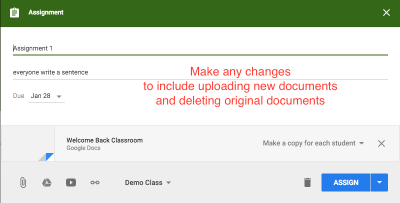
Don’t forget that Google implemented a great feature with being able to reuse posts from previous classes. Don’t worry about the date and time of the original assignment you pushed out the previous semester or year, as you are able to customize the new post. But why reinvent the entire assignment if nothing major has changed. Below are the steps to Reuse a post.
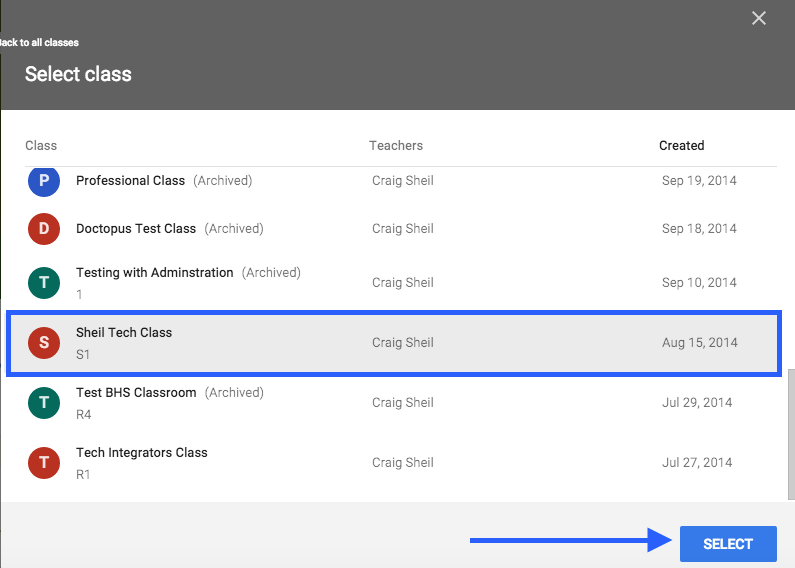
Step 1: Open up the class that you want to add a post to. Then click on the plus sign at the bottom right corner and select Reuse post.
Setting Up Conference Meetings using Google Calendar
Many of us can relate to having students sign up for a one-on-one conference with students for a particular project/assignment. Many of us passed around a sheet of paper and students signed up by putting their name on a piece of paper. Many of us had students email times that were good until we found a time that worked out great. There is nothing wrong with either of the above mentioned methods. However Google Calendar can help streamline and make this process a bit more efficient as well as remind you of your meeting time.
Google Calendar has a feature called Appointment Slots with all GAFE accounts. In other words, you cannot use this approach on a personal gmail account. It is also important to understand that in order to use the method, students MUST have a gmail account in order to sign up for an appointment slot.
Examples of this Feature:
- Teachers setting up meetings with students during Midterm week for oral presentations that occur out of the classroom
- Administrators giving teachers opportunities to sign up to go over evaluations
- Librarian giving teachers opportunities to send entire classes down to pick up a new novel or textbook (this is something that our Librarian, Mrs. Gilcreast, has set up for our teachers to help streamline the process of knowing when classes can pick up textbooks and novels).
Below are instructions to using Google Calendar Appointment Slots
Step 1: Create a Calendar
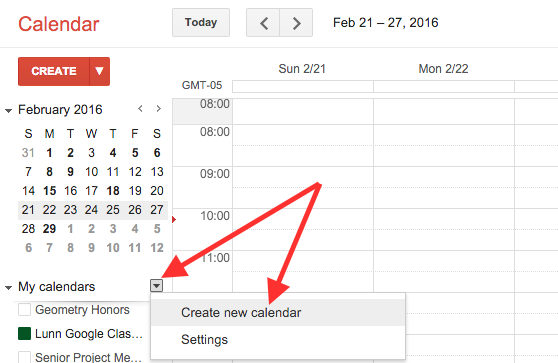
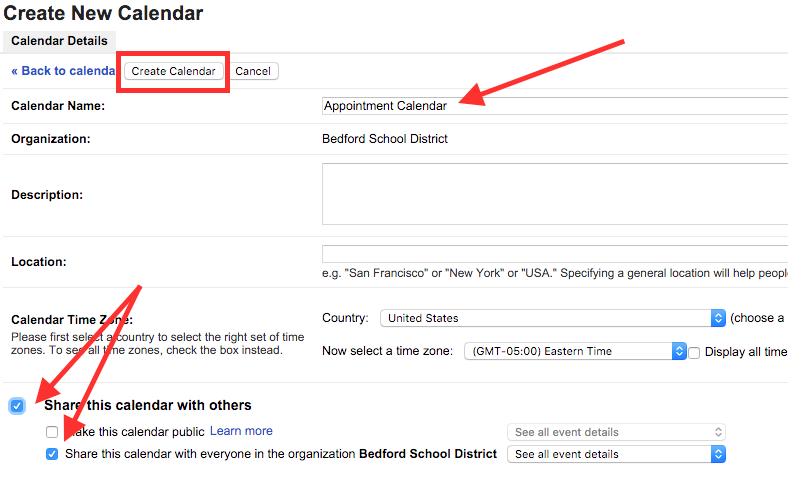
Create a calendar that is separate from the default calendar that was created (don’t use the calendar with your name on it). You might want to create a calendar called meetings or appointments.
You will add the name of the calendar, on the next window. It is also important to change the sharing permissions to anyone in your school domain. Then hit the Create Calendar button
Step 2: Create the Event
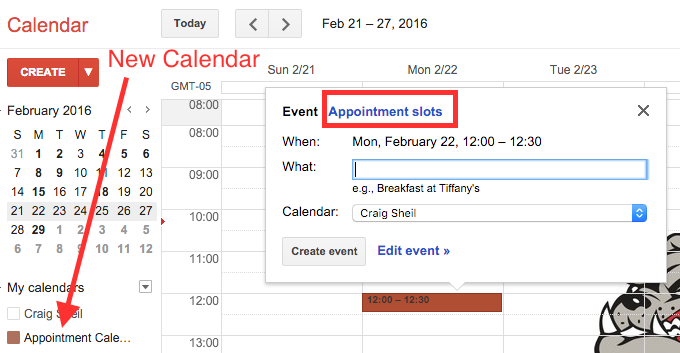
The new calendar will show up under your own calendar. Once this is done, click anywhere on the day you want to create the appointment. A pop up window will appear. Be sure to select Appointment slots at the top.
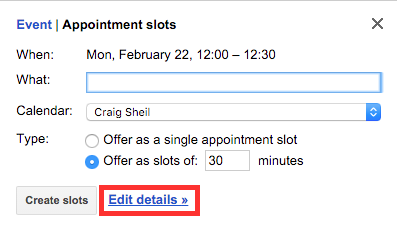
The pop up window view will change – click on Edit details to fill out all the necessary information.
Step 3: Add information to Event
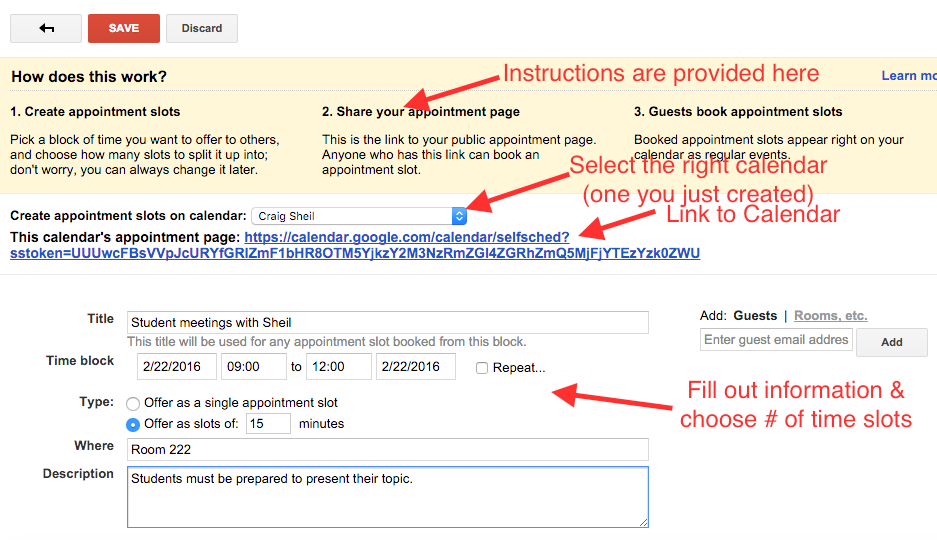
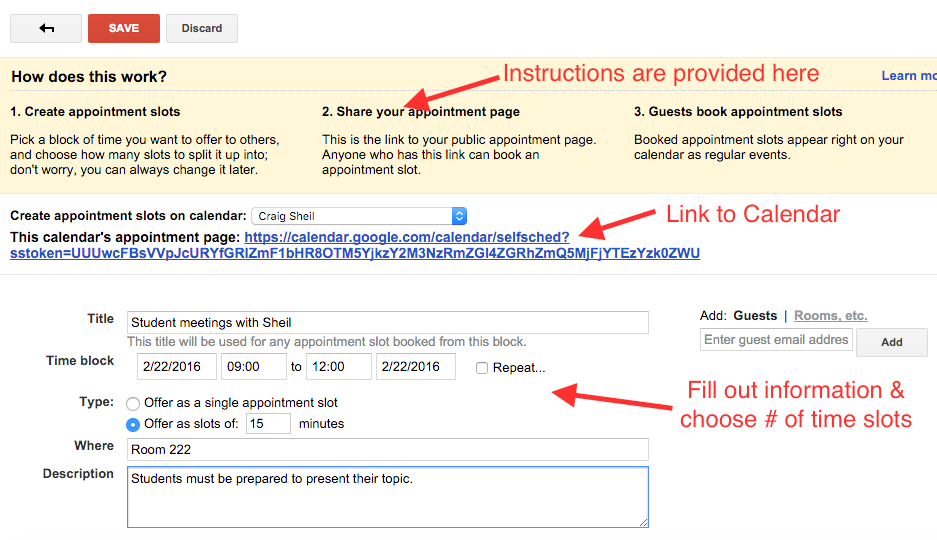
Add the necessary information to your event. Make sure you also select the RIGHT calendar from the drop down. Important to note that you create an event for the entire amount of time you are available and then determine how long you want the appointment slots to be. Google Calendar will then automatically create each of them individually.
Step 4: Sharing the Link to Calendar
The link to this calendar is provided. This is the link that you would need to put somewhere for students to access, either through Google Classroom or a Teacher Google Site. Students will not be able to view your available appointment slots unless they have this particular link. Students must be logged in with their Google account (if they are not already logged in).
Step 5: Signing Up for Appointments
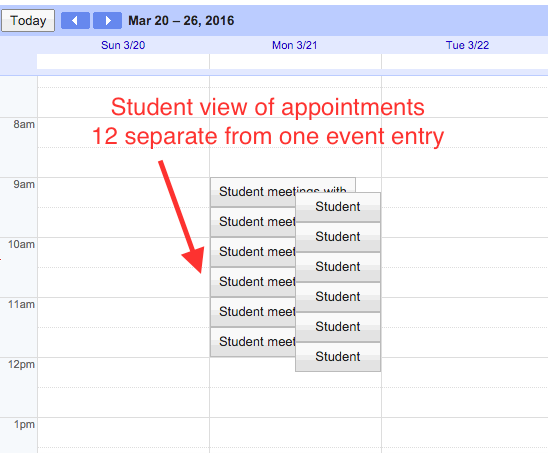
Once a student clicks on the calendar link, they will see the appointments that are available. Below are the separate appointments that were created from one entry 9am – 12pm availability with 15 minute appointment slots. As students start signing up for a time, they will no longer show up.
NOTE: When you hover over an appointment, it will actually give the specific time.
NOTE: You can also sign up for your own appointments if there are times that you want to block off throughout the block of time you created.
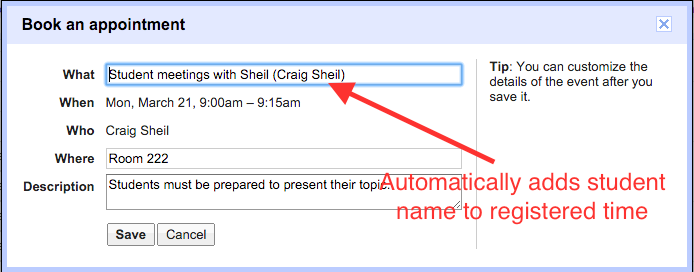
Once the student chooses a time, the appointment will automatically show up in your Google Calendar. Just click on the appointment and you will know who requested that time slot.
Using Your Own Google Drawings as Images in a Google Doc
From time to time, we all have wanted to include an image or picture of something in a Google Document. Google has made it very easy to make this happen.
- Drag and drop an image anywhere on the Google Document
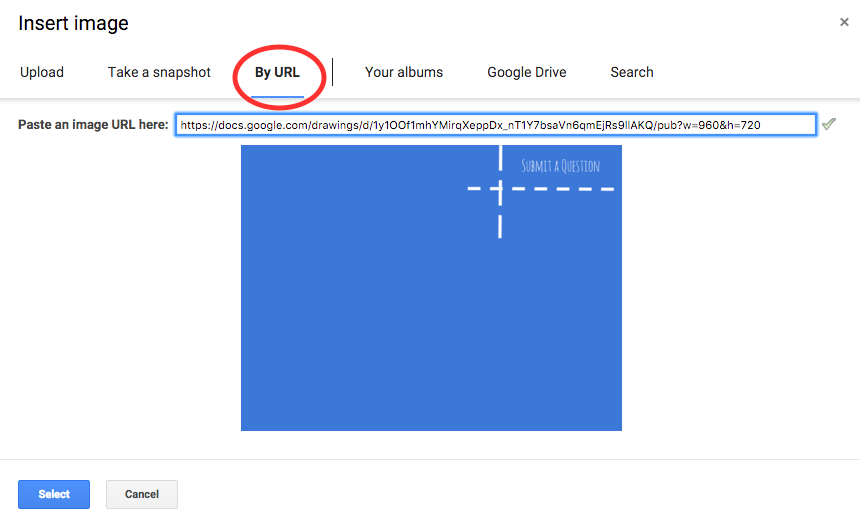
- Insert an image by URL
- Search ‘free to use’ images from Life and Stock Images databases
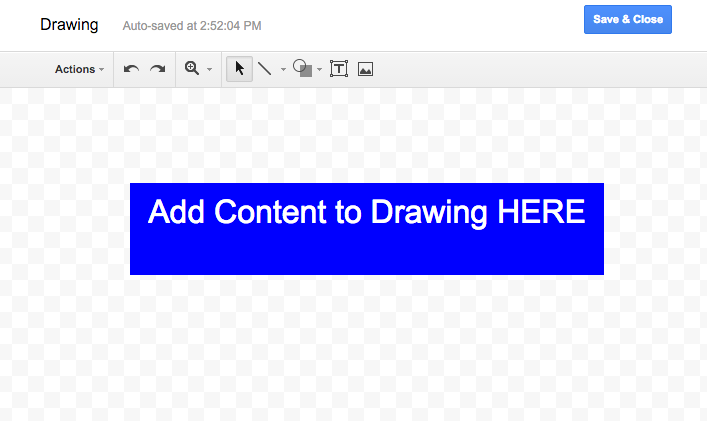
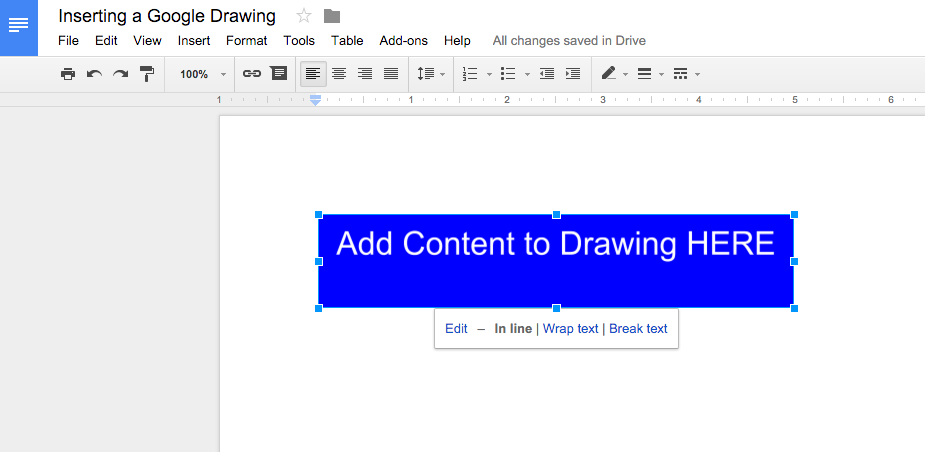
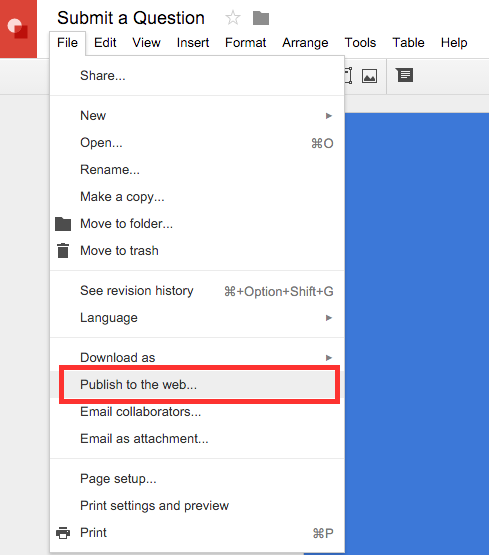
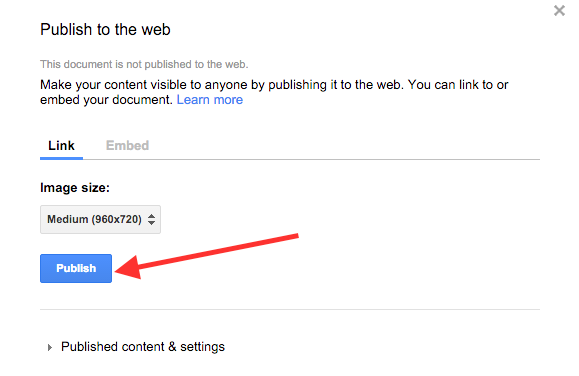
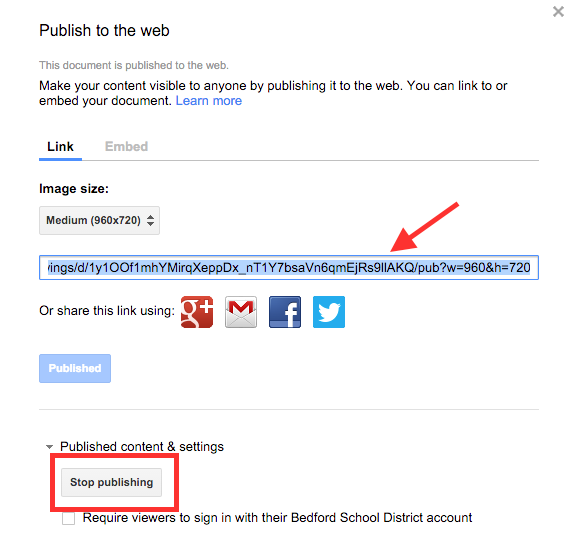
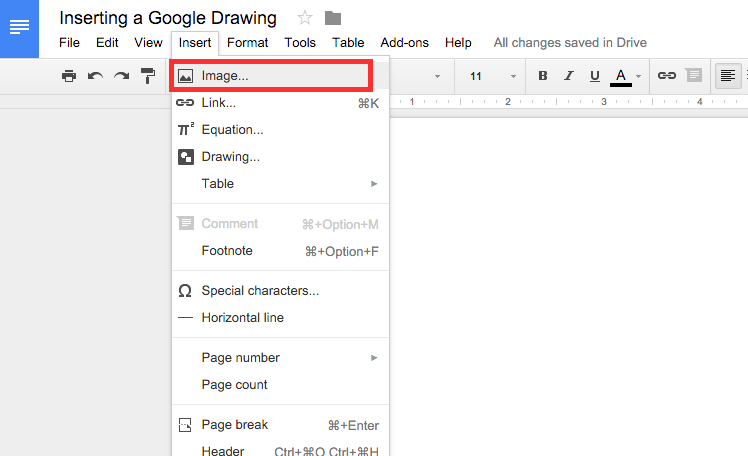
Below are two different ways an ‘always current’ Google Drawing can be included in a Google Document.
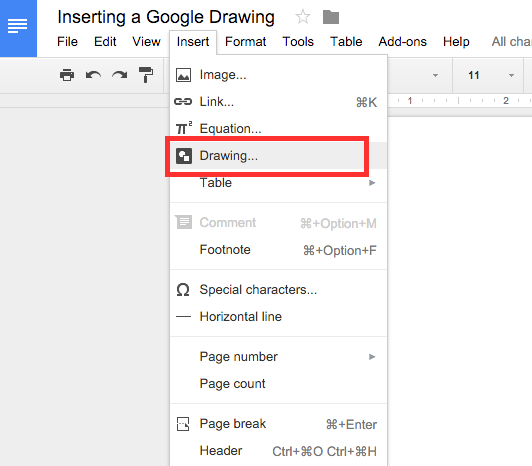
Inserting a ‘Live’ Pre-Made Google Drawing