Day 2 of Google: The Many ‘Different Views’ of Google Slides

On the second day of Google…

We are going to take a look at some view features of Google Slides.

Forcing Present Mode
Let’s face it, if you are using G-Suite you have shared a link to document in your Drive. Assuming sharing permissions have already been handled so that those that can view are able to view (anyone with the link), you can actually force present mode on a Google Slide presentation. Sometimes, you might not want people to be able to see the slides along the left side of your Google Slides. The traditional way many people would share a link outside of Google Classroom is to copy the link from the omni box (the search box in Chrome). Then share out the link via email etc.

Instead, you have the ability to share the presentation so that they only see the final slides and not the edited side of Google Slides. How might you ask? Go to the omni box – where the link is for the presentation. Follow these steps:

  • Move your cursor all the way to the right until you see the word ‘edit’ in the URL.
  • You will want to delete the word ‘edit’ and anything else to the right of the word ‘edit’. 
  • Replace what you deleted with the word ‘present’.
  • Copy your new link and provide this with those that you want to have access to. NOTE: Sometimes, I will paste the new link in a different tab and shorten it so that people can very quickly get to the presentation in present mode.

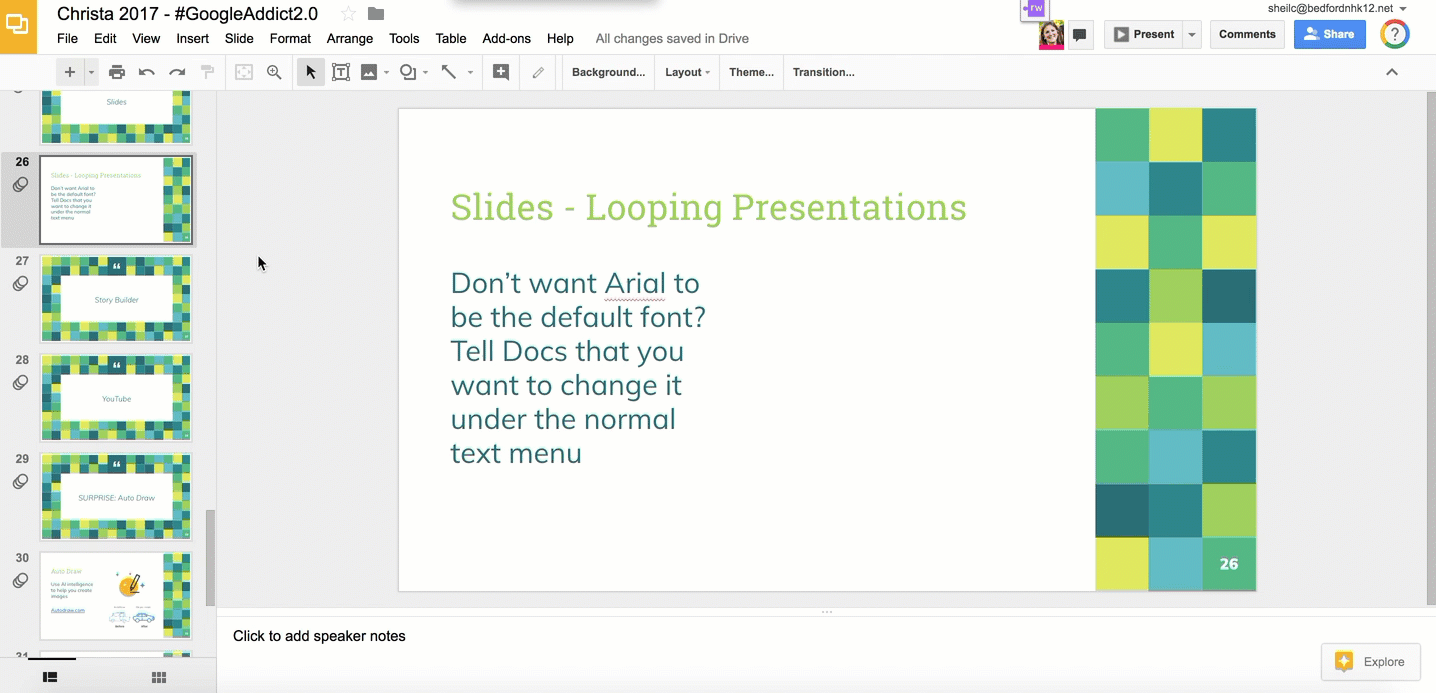
Looping Through Slides

You have the ability to loop through a Slide presentation without clicking through the presentation or restarting the presentation when it is done. This can be great for evening community events or photo slideshows.

Follow these steps:

  • Change share permissions to ‘Anyone with the Link’
  • Choose ‘Publish to the Web’ under File Menu
  • Determine how long you want each slide to show
  • Determine if you want the presentation to restart when it gets to the end and if you want the presentation to start right away when page loads
  • Select Publish button
  • Copy the link from the pop up window (this is the link that you will use for looping the presentation)

Viewing Slides in Edit Mode

Recently, Slides received an update where you could view your slides beyond the left side bar. You can actually have them show up in block mode on the entire screen. This way you can see the layout of the slides a bit better and easily move slides around. Just double click on a slide to get back into editing it.

How to make this happen? Select the block icon on the bottom left (under all of the slides).

And that is my Spiel…

Day 1 of Google: YouTube Tips

On the first day of Google….

We are going to take a look at YouTube. Hard to find someone out there now a days who has not used YouTube, either for their own enjoyment, or to share ideas/content in a lesson with students.

But, did you know the following:

Autoplay of YouTube Videos
1. The default to YouTube is for related videos to automatically play for you after your last video finishes. In some instances, you might want this. I am sure many can relate to watching a video that a friend has shared with you or posted on a social media outlet, you start to watch the video and then get hooked and end up watching other videos that are related to the same topic. Then 30 minutes later, you wonder where the time went!

However, in a school setting, you might not want a new video to start automatically – especially if you haven’t had a chance to view the next video prior to students seeing it. There is a very easy way to stop autoplay.

  • Search for a video
  • Top right, above the suggested “up next videos”, you will find Autoplay – just turn it off

Theater mode for YouTube
2. The default in YouTube is for the video that you searched to show up on the left side of the screen and the ‘up next/suggested videos’ to show up on the right. You actually have a way to move related content below the YouTube video. This way, there is less distractions if you are projecting your screen. No matter what video you search, switch the view to Theater mode (bottom right corner of the YouTube video).

True 360 Videos
3. Virtual Reality is a buzz word right now. Some teachers are looking for ways in which this concept can be implemented appropriately into curriculum. One particular way, is finding 360 videos in YouTube that could either be viewed in a VR headset or on a laptop/Chromebook. While there is a bit more effort to view on a Chromebook/laptop (in terms of clicking and dragging around in the video), you can still get a similar experience as if you were watching in a VR headset.

If you are interested in exploring around more 360 videos, add ‘360’ in your search. However, some people who upload a video might consider a video 360 when in reality it isn’t. A true 360 video will have the four arrows on the top left corner of the video. This allows you to ‘look behind you’ or ‘look above’ etc by either using the arrows or clicking and dragging inside of the video.

To learn more about how to create your own 360 video, read this previous blog post.

And that is my Spiel…

12 Days of Google

In the spirit of the season and the inspiration from Eric Lawson and Eric Curts, I have decided to run my own ’12 Days’ of tech tips and ideas. For the next 12 work days, I will provide a Google Tip/Trick that might help take your Google knowledge to the next level.

In the embedded Google Drawing below, I will link up each tip or idea each working day moving forward. (You might have to open up the Google Drawing in order for the icons to actually provide the Google Tip of the Day). You will also notice below the Google Drawing, I will have each day linked up.

Wishing everyone a happy and healthy holiday season!

And that is my Spiel…

Day 1 of Google: YouTube Tips
Day 2 of Google: The Many ‘Different Views’ to Google Slides
Day 3 of Google: Exploring with Google Trends
Day 4 of Google: Google Calendar
Day 5 of Google: Providing Feedback in Google Docs
Day 6 of Google: Google Drive – Location of Files
Day 7 of Google: Google Classroom – Creating to Accessing Student Work
Day 8 of Google: Chrome Keyboard Shortcuts
Day 9 of Google: Google Keep Features
Day 10 of Google: equatIO for Math and Science classes
Day 11 of Google: Change Default Text in Google Docs
Day 12 of Google: Creating Your Own GIF with AutoDraw, Google Photos & Google Slides