
A couple of months ago, I had blogged about how BHS received two Jamboards through a grant from Google and BenQ – you can view that blog post HERE. Since that time, we have had an opportunity to investigate how we could implement Jamboard in the classrooms. This blog post will highlight five different ways, in five different settings, on how we have used Jamboards in the educational setting. This blog post is a bit longer than usual but feel as though it is important to truly capture just how we have been using the new tool. My hope is that it will help inspire you to trying Jamboard with your own students.
Quick Overview of Jamboard
- Three different versions – Jamboard (board itself), Jamboard through web (jamboard.google.com), Jamboard through app (touch screen chromebooks that have Google Play access)
- When using the Jamboard board, students can draw, annotate, add digital sticky notes, add images and content from web.
- Students can access Jamboard files (called Jam) on their chromebooks as well to add content.
- All Jams are saved and located in Google Drive.
Jamboard Examples
Computer Science
 Mr. Fritz teaches an Intro to Programming class at Bedford. At the end of last semester, he wanted to provide his students an opportunity to collaboratively code. Thus, he decided to use Jamboard to help facilitate ideas and thoughts prior to the group going right to coding the product.
The class was divided into two groups. They each had to come up with a digital artwork that they wanted to code to show in an ‘art show’. Mr. Fritz created a Jam shell for groups to use to document their progress throughout the three days. Click HERE to see a copy of that shell.
Day 1: Brainstorming Day
Students came up with who was serving what role (project manager, coder, sketch artist, storyteller, presenter) as well as what ideas they had about what they wanted to create.
Day 2: Coding day
Most of this day consisted of students determining who was coding what part of the art work. Students also came up with a storyline as to why the artwork was created and what it represented.
Day 3: Finalize Coding/Presentation Day
 Students made final changes to their code prior to showcasing their ‘art work’ through a short presentation to a panel of three staff members using the Jamboard. They were judged on the final product as well as the story and how it connected with the product.
Entrepreneurship
Mrs. Wilczewski teaches an Entrepreneurship course. Each year, she asks students to research an entrepreneur in groups. Mrs. Wilczewski decided to use the Jamboard to help curate questions and discoveries of an entrepreneur. One of the entrepreneurs happens to be Shane Cox from PEEQ – creators of Qball. Qball is an affordable, throwable microphone ball that can be used in classrooms. The idea is that students are able to talk into the ball so that everyone in the room can hear what each student is saying.
Day 1: Play and Research
During a class opener, students used the Qball to share their thoughts with the posed question (prior to knowing anything about the company or why they were using the product). Students researched their entrepreneur and created a Google Slide presentation with what they discovered.
Day 2: Learning about Shane and PEEQ
 Two jamboards were brought into class. Students learned that they had an opportunity to have a discussion with one of the entrepreneurs, Shane. The students who researched Shane placed information on what they discovered about Shane and his company while the rest of the class came up with questions that they wanted to ask Shane. Then the class determined what could be answered already without the interview with Shane. To view this Jam, click HERE.
Day 3: Deeper Dive with Research
 The class continued to dive deeper into Shane and his company to see if they could find out more information, which they added to the research page on the Jamboard. Students then used the Jamboard to determine their final questions that they had that could not be answered. This Jam file was then shared with Shane so that he knew prior to the conversation the path that the students took to get to the questions that they had.
Day 4: Google Hangout Conversation
Shane agreed to participate in a Google Hangout with the class (as well as another Entrepreneurship class from Nashoba Regional High School in Massachusetts – Thanks to Mary Marotta for getting Mr. Andreopoulos and Ms. Grigas on board and collaborating with us.) We projected the hangout through the projector for the class to see. One Jamboard had the slide with the questions that we wanted to ask while one student used the other Jamboard to scribe the conversation with Shane. Students were really appreciative of Shane in taking the time to talk with them. It is not everyday that a student can go home and when a parent asks, what did you do today, they respond, “Oh nothing major. Just talked with an actual entrepreneur of a company through Google Hangout.”

Moving forward, students were given access to the Jam, through Google Classroom, to write their reflection about the experience and the learning.
This was a tremendous experience for the students. It was a great opportunity to collaborate with another high school from a different state. BHS students would ask two questions, and NRHS would ask two questions. It was a great dialog between the different schools. Who knows…if we do this again, I can see both schools sharing a Jamboard to curate questions and research together. It made me realize how easy it can be for different schools to collaborate and that we need to be doing more of this in the future!
Marine Biology
Mrs. Colburn teaches a Marine Biology course at Bedford. Mrs. Colburn teaches with the new NextGen standards in Science. She has been making great effort in redesigning how she teaches her curriculum. Rather than spoon feeding the information to the students, she is providing a phenomenon as an essential question. Students then come up with questions about that phenomenon. Mrs. Colburn will then design lessons around those questions to help guide them along the journey in answering the essential question. Mrs. Colburn has done this activity without tech before but decided to try it out with the use of Jamboard.

Day 1: Introduction to Essential Question
 Students were introduced to the “message in a bottle” phenomenon. Students had to come up with a model with how they thought a message in a bottle gets from one location to another. Students were put into groups. Two groups were given the opportunity to draw their model with the Jamboard while the remaining groups used whiteboards and markers to showcase their model. Once each group came up with their ideas, we used the Jamboard app on the iphone to take pictures for those groups who were not able to use the Jamboard to draw their model to get all models in one Jam. Click HERE to see a the jam shell that was created.
 Then, students were given access to the Jam with their chromebooks, through Google Classroom, so that they could type questions that they have. Once that was completed, students sat in a u-shape in front of one of the Jamboards to then come up with a consensus model based on all models. They also analyzed the questions from the class to create categories for the questions to fall into.
Moving forward, students will then learn more about how this phenomenon happens based on questions that were brought up. The class will then revisit the Jam later in the unit to see if they have addressed their questions as well as if they need to re-design their model from the learning.
Psychology
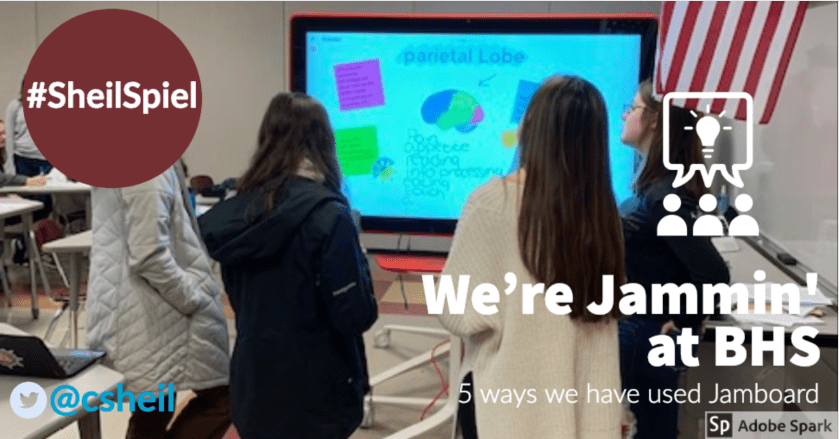
Mrs. Dolce teaches a Psychology course at Bedford. This week, she started the brain unit with her students. She wanted to redesign how she introduces the brain to the students, so we designed a lesson around using the Jamboards to help curate information about the brain.
Day 1: Learning about the Brain
 Mrs. Dolce divided students into six groups of four. Each group was responsible for one part of the brain. Students were given 10-15 minutes of time to do some research. Then, groups were given 15 minutes each at the Jamboard board to share whatever information they wanted to share about their part of the brain keeping in mind to make it visually appealing. Click HERE to see a copy of the Jam shell that was created for this activity.
For the students that were not at the board, they were given another small task to investigate one of the 12 smaller components of the brain in pairs. Information about these were put on ‘old school’ poster sticky notes around the room. It was a great balance of using different resources to discover information.
Moving forward, students were given the Jam file via Google Classroom with view only access. The class will take a look at the Jam together and use for future discussions/assessments.
Planning with a Team
 Here is a great non-classroom use of Jamboard. A team of four staff members, Chris O’Hara, Jess Gilcreast, Martha Pond and I, are in the process of applying for a grant to implement flexible classroom redesign for a math classroom, humanities classroom, and part of the school’s library. The team has found that brainstorming with a Jamboard has been helpful. The team sits around the board and jots down notes on the board to help keep organized.
Final Thoughts
Teachers have always given students an opportunity to think and brainstorm ideas when asking students to complete a task collaboratively. What I like about Jamboard in each of these scenarios is that there is actual evidence that students collaborated. You can see their thought process visually – what we as humans tend to gravitate more to lately. In all of these examples listed above, students seemed to enjoy using the Jamboard. Students were eager to share their thoughts, were having fun, and were engaged.
It is important to note that with every implementation of the Jamboard, a demonstration of how to use some of the features of the board was given. It was done in a manner that made sense. The teacher would showcase the tools as if they were doing actual work – helping make the connections instead of just talking about what it can do.
As with any tool that is implemented, we, both students and teachers, have learned some things along the way. It does take a couple of minutes to discover what you can do on the board. For instance, while two people can write at the same time on the board, one person can’t add an image while another is writing. Students also mentioned that the web application of Jamboard is limited. I have reminded students that Jamboard is a relatively new tool and we have to give it time before more features will become available. A prime example of this is that in a couple of weeks, students will be able to add images from the web application on their chromebook.
Some wish items from students:
- Ability to add an image and have it be the background to annotate over the image
- Ability to lock certain items so that things can’t be moved by accident.
I am extremely proud of the staff who have given Jamboard a try. Really thankful that I work in a building with staff who are willing to step outside of their comfortable limits. I look forward to seeing where we can take this in the future as we continue to find applications of the tool. If you have any questions or would like to chat about how you can use this in your curriculum, you know where to find me.
And that is my Spiel…

4 thoughts on “We’re Jammin’ at BHS – 5 Ways We Have Used Jamboard”