 On the first day of Google….
We are going to take a look at YouTube. Hard to find someone out there now a days who has not used YouTube, either for their own enjoyment, or to share ideas/content in a lesson with students.
But, did you know the following:
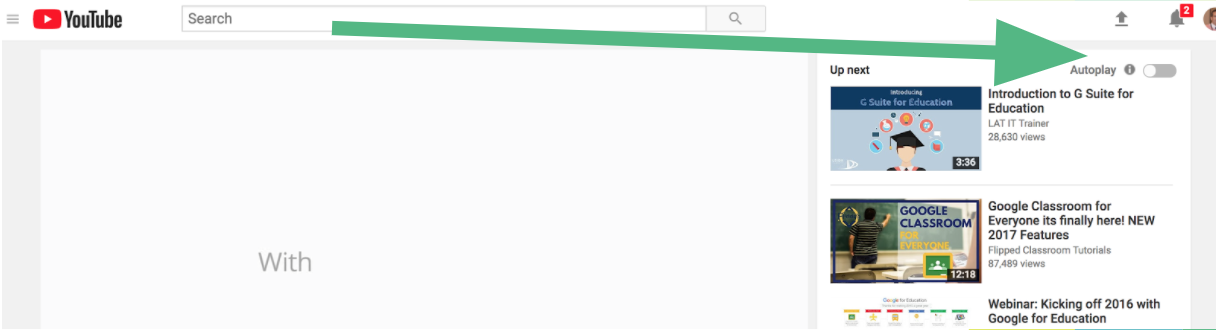
Autoplay of YouTube Videos
1. The default to YouTube is for related videos to automatically play for you after your last video finishes. In some instances, you might want this. I am sure many can relate to watching a video that a friend has shared with you or posted on a social media outlet, you start to watch the video and then get hooked and end up watching other videos that are related to the same topic. Then 30 minutes later, you wonder where the time went!
However, in a school setting, you might not want a new video to start automatically – especially if you haven’t had a chance to view the next video prior to students seeing it. There is a very easy way to stop autoplay.
- Search for a video
- Top right, above the suggested “up next videos”, you will find Autoplay – just turn it off
Theater mode for YouTube
2. The default in YouTube is for the video that you searched to show up on the left side of the screen and the ‘up next/suggested videos’ to show up on the right. You actually have a way to move related content below the YouTube video. This way, there is less distractions if you are projecting your screen. No matter what video you search, switch the view to Theater mode (bottom right corner of the YouTube video).
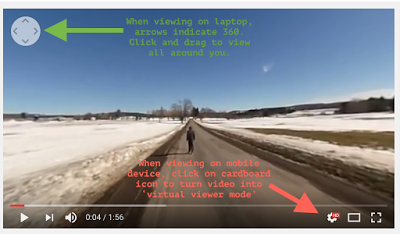
True 360 Videos
3. Virtual Reality is a buzz word right now. Some teachers are looking for ways in which this concept can be implemented appropriately into curriculum. One particular way, is finding 360 videos in YouTube that could either be viewed in a VR headset or on a laptop/Chromebook. While there is a bit more effort to view on a Chromebook/laptop (in terms of clicking and dragging around in the video), you can still get a similar experience as if you were watching in a VR headset.
If you are interested in exploring around more 360 videos, add ‘360’ in your search. However, some people who upload a video might consider a video 360 when in reality it isn’t. A true 360 video will have the four arrows on the top left corner of the video. This allows you to ‘look behind you’ or ‘look above’ etc by either using the arrows or clicking and dragging inside of the video.
To learn more about how to create your own 360 video, read this previous blog post.
And that is my Spiel…