

On Day 8, we look back at Google Slides. You might be saying to yourself, hey Craig, aren’t you cheating right now going back to Slides? One could say yes, but there was just so much with Slides that I felt it made more sense to break it up into two days. Hope you find at least one of the tips useful to put into your practice.
SHORTCUT KEYS
For those of you who have read my blog posts before, you know that I am big on short cut key to help streamline my workflow. The three below can be helpful for those of you who find yourself working with slides or drawings a lot. They work with both tools.
Duplicating
Prior to June 2020, anytime that I wanted to duplicate an object, a text box, an image, words, etc…I would use the following keystrokes.
Command + C (on mac) or Control + C (Chromebook) so that I could copy what I want a duplicate of. Then I would select Command + V (on mac) or Control + V (Chromebook) to paste the item that I want a duplicate of. Well, it was brought to my attention that that shortcut was not a shortcut.
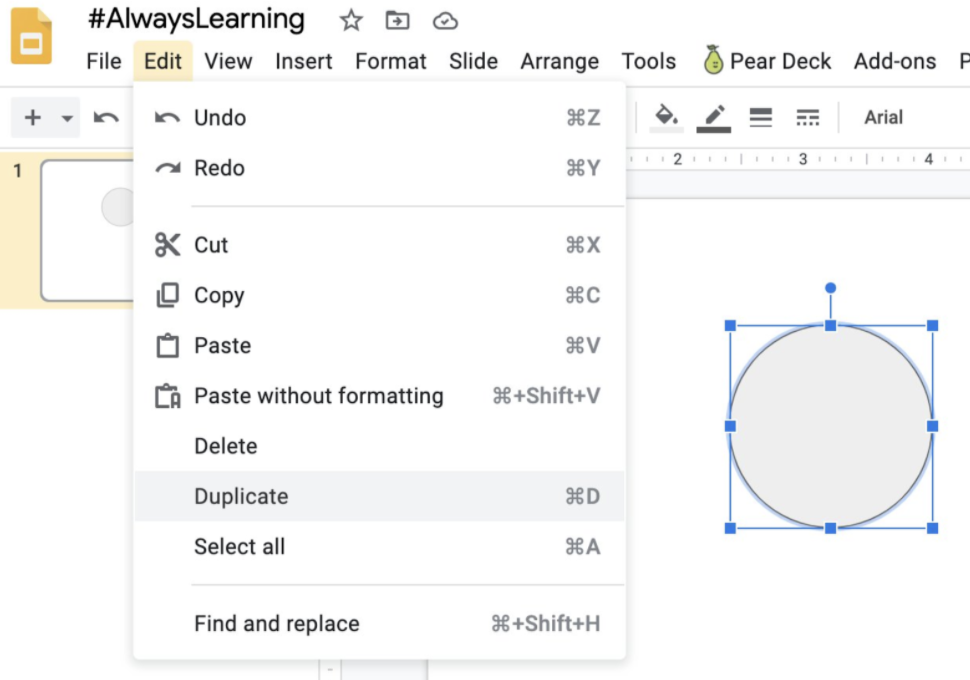
Instead, the shortcut is to select the item I want a duplicate of and then select Command + D (mac) or Control + D (Chromebook). This will right away duplicate the item I selected and make a copy of it. You can do this as many times as needed. AMAZING. Try it! You won’t waste that precious extra second again with copy and paste when duplicating in Google Slides or Google Drawings.
Send to Front
Working with multiple items and you need to layer an image on top of another? No problem. The shortcut keys are:
Command, Shift, (up arrow) – Mac
Control, Shift, (up arrow) – Chromebook

Send to Back
Working with multiple items and you need to layer an image behind another item? No problem. The shortcut keys are:
Command, Shift, (down arrow) – Mac
Control, Shift, (down arrow) – Chromebook
Q&A FEATURE
This is not a new tool, but I don’t think it is one that is widely used. It was not until a teacher asked me recently…”Is there a way for my in person students and my at home students who are participating through Google Meet to be able to see the questions that each other is asking?” (We don’t have our in person students all join a Google Meet for multiple reasons). My response was yes! There is a built in feature with Google Slides called Q&A. This is always available anytime a slide presentation goes into present mode. However the speaker must turn on the feature. You might be asking well why not use the Q&A feature built right into Meets. Yes, that is an option but only the students at home are able to see those questions. NOTE: This feature only works when a slide presentation is being presented to an audience.


Rather than click on the Present button, select the drop down arrow on the right and select Presenter view. A popup window will show where normally speaker notes will appear. Instead, click on the Audience tools. This is where the speaker can turn on Q&A. A link to that presentation at that time will appear at the top and students can go to that and ask questions. Any participant will be able to see what each other is asking and can rate the questions. (This is helpful for those times where the teacher only has a short amount of time to answer questions…top rated ones will be the ones that get answered).
The short video below will walk you through the process.
CUSTOM HEADERS
Some staff like the freedom of being able to create their own headers/banners, instead of using what is provided. Over the summer, Tony Vincent posted on twitter a great visual to help people with the correct size requirements for different tools. NOTE: You can change the size of a file either in Google Slides or in Google Drawings.

To get started, go to File, Page Setup. Select Custom and change the dimensions based on the requirement for the tool you are working with. Once done, you will go to File, download as, and choose either jpg or png file. Then upload file to the tool you are working with.
And that is my Spiel…
